

Back Drop
Using sheet styrene or aluminum materials for the back drop has been gaining popularity among model railroaders. As this layout is in the garage, humidity and thermal swings cannot be controlled as much as the home environment. A review of materials at the local big box builders supply store found aluminum flashing in rolls two feet wide by fifty feet long. One roll completed nearly three-fourths of the perimeter back drop for South Elkins. This material is pre-painted white on one side and a chocolate brown on the other.
Installation followed this procedure.
- Erect 2 x 2 support posts.
- Attach vinyl channel to the support posts.
- Punch tabs in the top of the aluminum sheet about 8 to 10 inches apart. Be sure the tabs point out on the white side.
- Once the tabs are punched, then set the aluminum sheet roll onto the bench work about fifteen to twenty feet from your starting point. Slowly unwind the roll until the sheet gets to your start point.
- Position the sheet along the vinyl channel and carefully slide it up into the channel until the tabs snap into place. A putty knife is handy, and you may need work gloves for this step. Try not to crimp the metal sheet.
- Continue installing to the end of your roll, unrolling as you go.
Yeah. It’s pretty easy. In fact, I installed the sheet myself after the crew left one day. They helped with the supports and the channel, but I was anxious to get the back drop into place so I did it myself in about 45 minutes. The photos below offer some idea on installation.
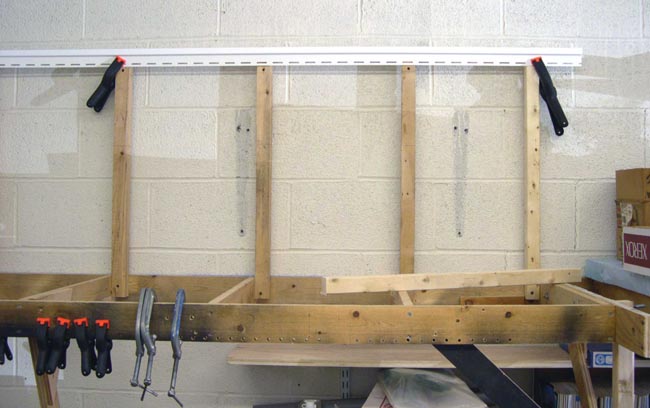 |
| This image depicts the support structure. The 2 x 2 uprights are attached to the bench work and the channel is attached at the top of the uprights. Be sure you have the top level. Drywall screws anchor the channel in place so the clamps can move along to the next project. |
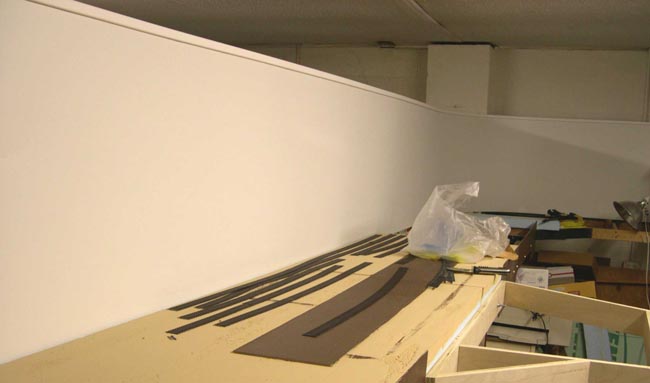 |
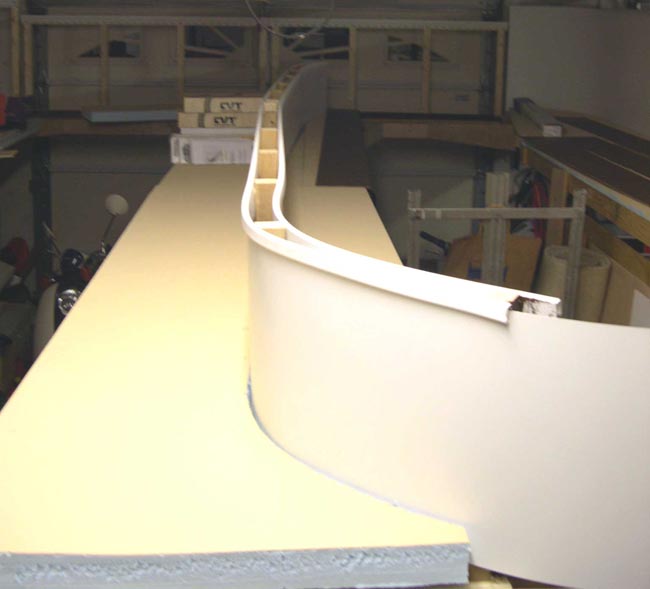
| A long smooth stretch of back drop near the C&I wye. Note the nicely curved corner in the background. |
A back drop was also needed along the center portion to separate the 12th Street and Mill Creek scenes. I did not want to use the full height of the metal sheet here, so I cut it to half of the height. First I unrolled the overall length of the piece I would need. Since I needed back drop on both sides, I realized I only needed to be sure the over length was correct. This material is easily cut by scoring with a utility knife and carefully bending the metal until it snaps.
After the length was set, then I carefully worked to split the sheet down the center so I would have one foot tall sections for the back drop. A long straight edge, a careful eye, a sharp blade and some patience will make this job roll. Don’t try to rush anything at this time. If you do, you won’t score the metal along the line you want. Once the sections are cut, I used a fine sandpaper to take the cut edge off of the metal. The photos below depict some of the progress along the center portion of the layout.
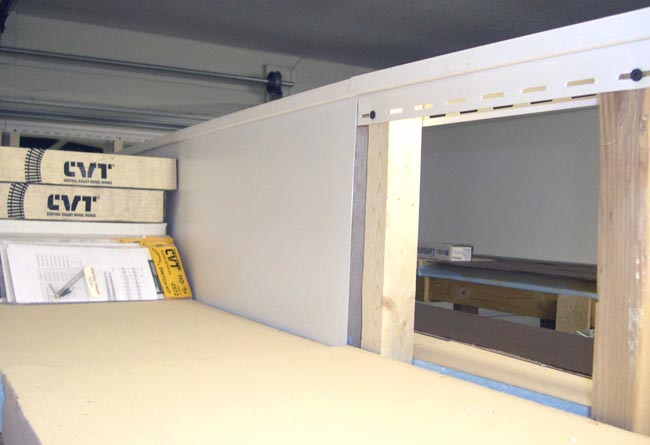 |
| Part of this back drop is installed. The view is from the 12th Street side of the center peninsula. The back drop separates this from the Mill Creek scene. Note how the back drop hangs below the foam. |
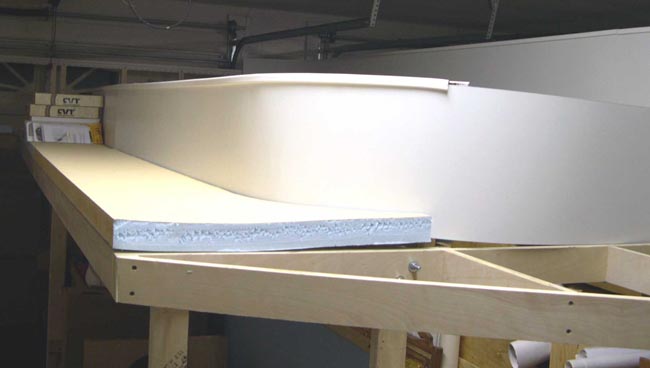 |
| Here's an image taken just minutes after the one above. The rest of the back drop in the 12th Street side has been installed. The C&I wye is just to the right. |
 |
| If anyone were this tall, this is what you would see as you look down the center part of the layout. 12th Street is on the left, while Mill Creek is on the right. |
Direct your comments and/or questions to: 43admin@hansmanns.org
All content and images copyright 2006 by EWHansmann, unless otherwise indicated.